CSX Server Logging On
This page provides a quick step by step walkthrough of getting logged into your CSX server account for the first time. Following through with your own information is highly recommended. At the end of the session, you should be able to log into your account from both on and off campus, as well as transfer files and use the handin program. Suggestions for further elements are always welcome.
- Finding your Username
✓ Find and write down your username
-
If you haven't already activated your O-Key account, you need to do so before proceeding further. O-Key is the central authentication service operated by OSU's IT department and is used for authentication on the CSX servers.
-
The same short usernames provided by O-Key are used on the Computer Science servers (CSX), so you won't need to remember a separate account name. However, it's important to understand the difference between the long and short account names.
-
-
Log into your O-Key account and review your Personal Profile.
-
Look under your name for an entry called "O-Key Account Username:" This is a short series of characters that you'll use to log in. It is usually formed from parts of your name to make it easier to remember.
-
Be aware that this short username is not the same as the "O-Key Login Address" further down the page, which is an email address containing your full name.
-
The short username should be no longer than 7 characters and does not include
@okstate.eduor any other domain extension.
-
- Resetting your Password
- The CSX servers use O-Key for both usernames and passwords; if you want to reset your password you will need to do so via O-Key Password Reset
- Using the VPN (to Login from Off-Campus Network)
✓ How to install Cisco AnyConnect (if needed)
✓ How to connect to the campus VPN (if needed)
If you're only going to access the servers from the Stillwater campus, you can probably ignore this step entirely. But if you're ever going to connect from somewhere else, you'll need to use the university's Virtual Private Network. A VPN effectively makes your device part of the campus network, and thus able to "see" campus systems and not be blocked by firewalls that otherwise prevent unwanted visitors.
Logging into the CSX servers might require OSU's VPN in order to access them while connected to MyResNet Wi-Fi.
Installing OSU's VPN
Microsoft Windows, Apple Mac OS X/OS, and Linux
-
In Firefox or Chrome visit the OSU VPN (osuvpn.okstate.edu). Internet Explorer and Edge are not recommended.
-
Enter your O-Key Login Address and Password into the appropriate text boxes of the login portal.
-
Select the Login button.
-
Choose the Download button from the Download & Install page. The software download should process automatically.
-
Locate and open the AnyConnect file in your computer’s downloads folder.
-
Select the Next button from the Setup Wizard.
-
Accept the End-User License agreement by choosing the I accept radio button.
-
Select the Next button from the same window.
-
Choose the Install button from the Ready to Install window.
-
Select the Yes button from the User Account Control window.
-
Choose the Finish Setup Wizard button to complete the setup. Please see the Connecting to OSU's VPN section below for information on connecting to the OSU VPN.
Apple iPhone and iPad
-
Access the App Store icon from the display screen.
-
You will need to login using your App Store/iCloud credentials.
-
Search for Cisco AnyConnect.
-
For Apple iOS 10.0 or higher, select the Get located next to the Cisco AnyConnect heading. For Apple iOS lower than 10.0, select the Get located next to the Cisco Legacy AnyConnect heading.
-
Choose Install, which should replace Get.
-
A turning circle should replace Install.
-
Select Open, which should replace the turning circle when installation is complete.
-
Either an AnyConnect or Legacy AnyConnect shortcut will appear on your device display screen.
Google Android
-
Install Cisco AnyConnect from the Google Play Store.
-
Choose Accept when asked for access to device information.
-
An AnyConnect shortcut will appear to your device display screen.
Connecting to OSU's VPN
Microsoft Windows, Apple Mac OS X/OS, and Linux
-
Launch the Cisco AnyConnect program. In Windows click the Search button in the bottom left corner of the screen, and search for “Cisco AnyConnect”.

-
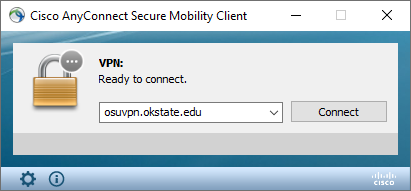
Type “osuvpn.okstate.edu” in the field, and click “Connect”.
-
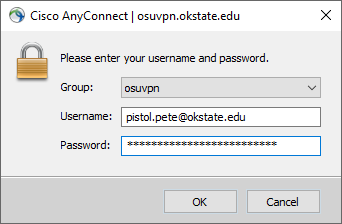
Enter your O-Key credentials and click “OK.”
-
- Logging into a CSX Server
✓ How to login into the CSX server
All command-line logins to CSX must use the SSH protocol. While third-party software like PuTTY for Windows can certainly be used, for simplicity only the command-line ssh executable (available for most modern systems) will be discussed here.
-
Open a Command Line:
- On a Mac, open the Terminal app.
- On Windows 10, open either cmd or PowerShell.
-
Enter the SSH Command:
- Type the following, replacing "myusername" with your own username:
ssh myusername@csx.cs.okstate.edu
- Type the following, replacing "myusername" with your own username:
-
Enter Your Password:
- When prompted, enter your O-Key password.
- For security, nothing will appear as you type. Press Enter when done. Your password will be accepted if it’s correct.
- Example;
-
Understanding Hostnames:
- The CSX system includes several servers you can log into. Your instructor or TA will advise you of any unusual requirements but largely you will likely be using the CSX load-balancer with the hostname csx.cs.okstate.edu
- The load-balancer logs you into a random server from the group csx0, csx1, csx2, csx3 or csx4 and will pick a server that is currently online in case of reboots and other downtimes.
- Two other hosts, csg1.cs.okstate.edu and csg2.cs.okstate.edu, can be used in the same
way as the CSX servers but additionally have GPUs for GPU-based performance computing.
However, the load-balancer will never log you into one of those.
-
- Uploading Files: An Example
✓ How to upload files to CSX
Upload using SSH:
-
Open a Command Line:
- On a Mac, open the Terminal app.
- On Windows 10, open either cmd or PowerShell.
-
For uploading files, use one of two SSH-based transfer protocols SCP or SFTP:
- It doesn't matter which protocol you use, as both work effectively.
- There are many GUI clients available for multiple platforms that support one or both protocols.
-
Using SCP command:
- For example: If we want to copy a file name “myfile.txt” from local system to CSX:
scp myfile.txt pete@csx.cs.okstate.edu:~/homework
In this example:
myfile.txtis the filename.peteis the username.csx.cs.okstate.eduis the hostname.~/homeworkis the directory.
You could even use the
-roption to recursively copy a directory. The-roption in thescp(Secure Copy) command stands for "recursive". When used, it tells the system to copy not just the specified directory, but also all of its contents, including subdirectories and the files within them, to the destination.For Example:
scp -r directory pete@csx.cs.okstate.edu:~/homeworkUpload using WinSCP (Windows Only):
WinSCP is a free application for Windows that can use the SCP and SFTP protocols.
-
Download WinSCP
- Go to https://winscp.net/eng/download.php and download/install WinSCP application.
- Go to https://winscp.net/eng/download.php and download/install WinSCP application.
-
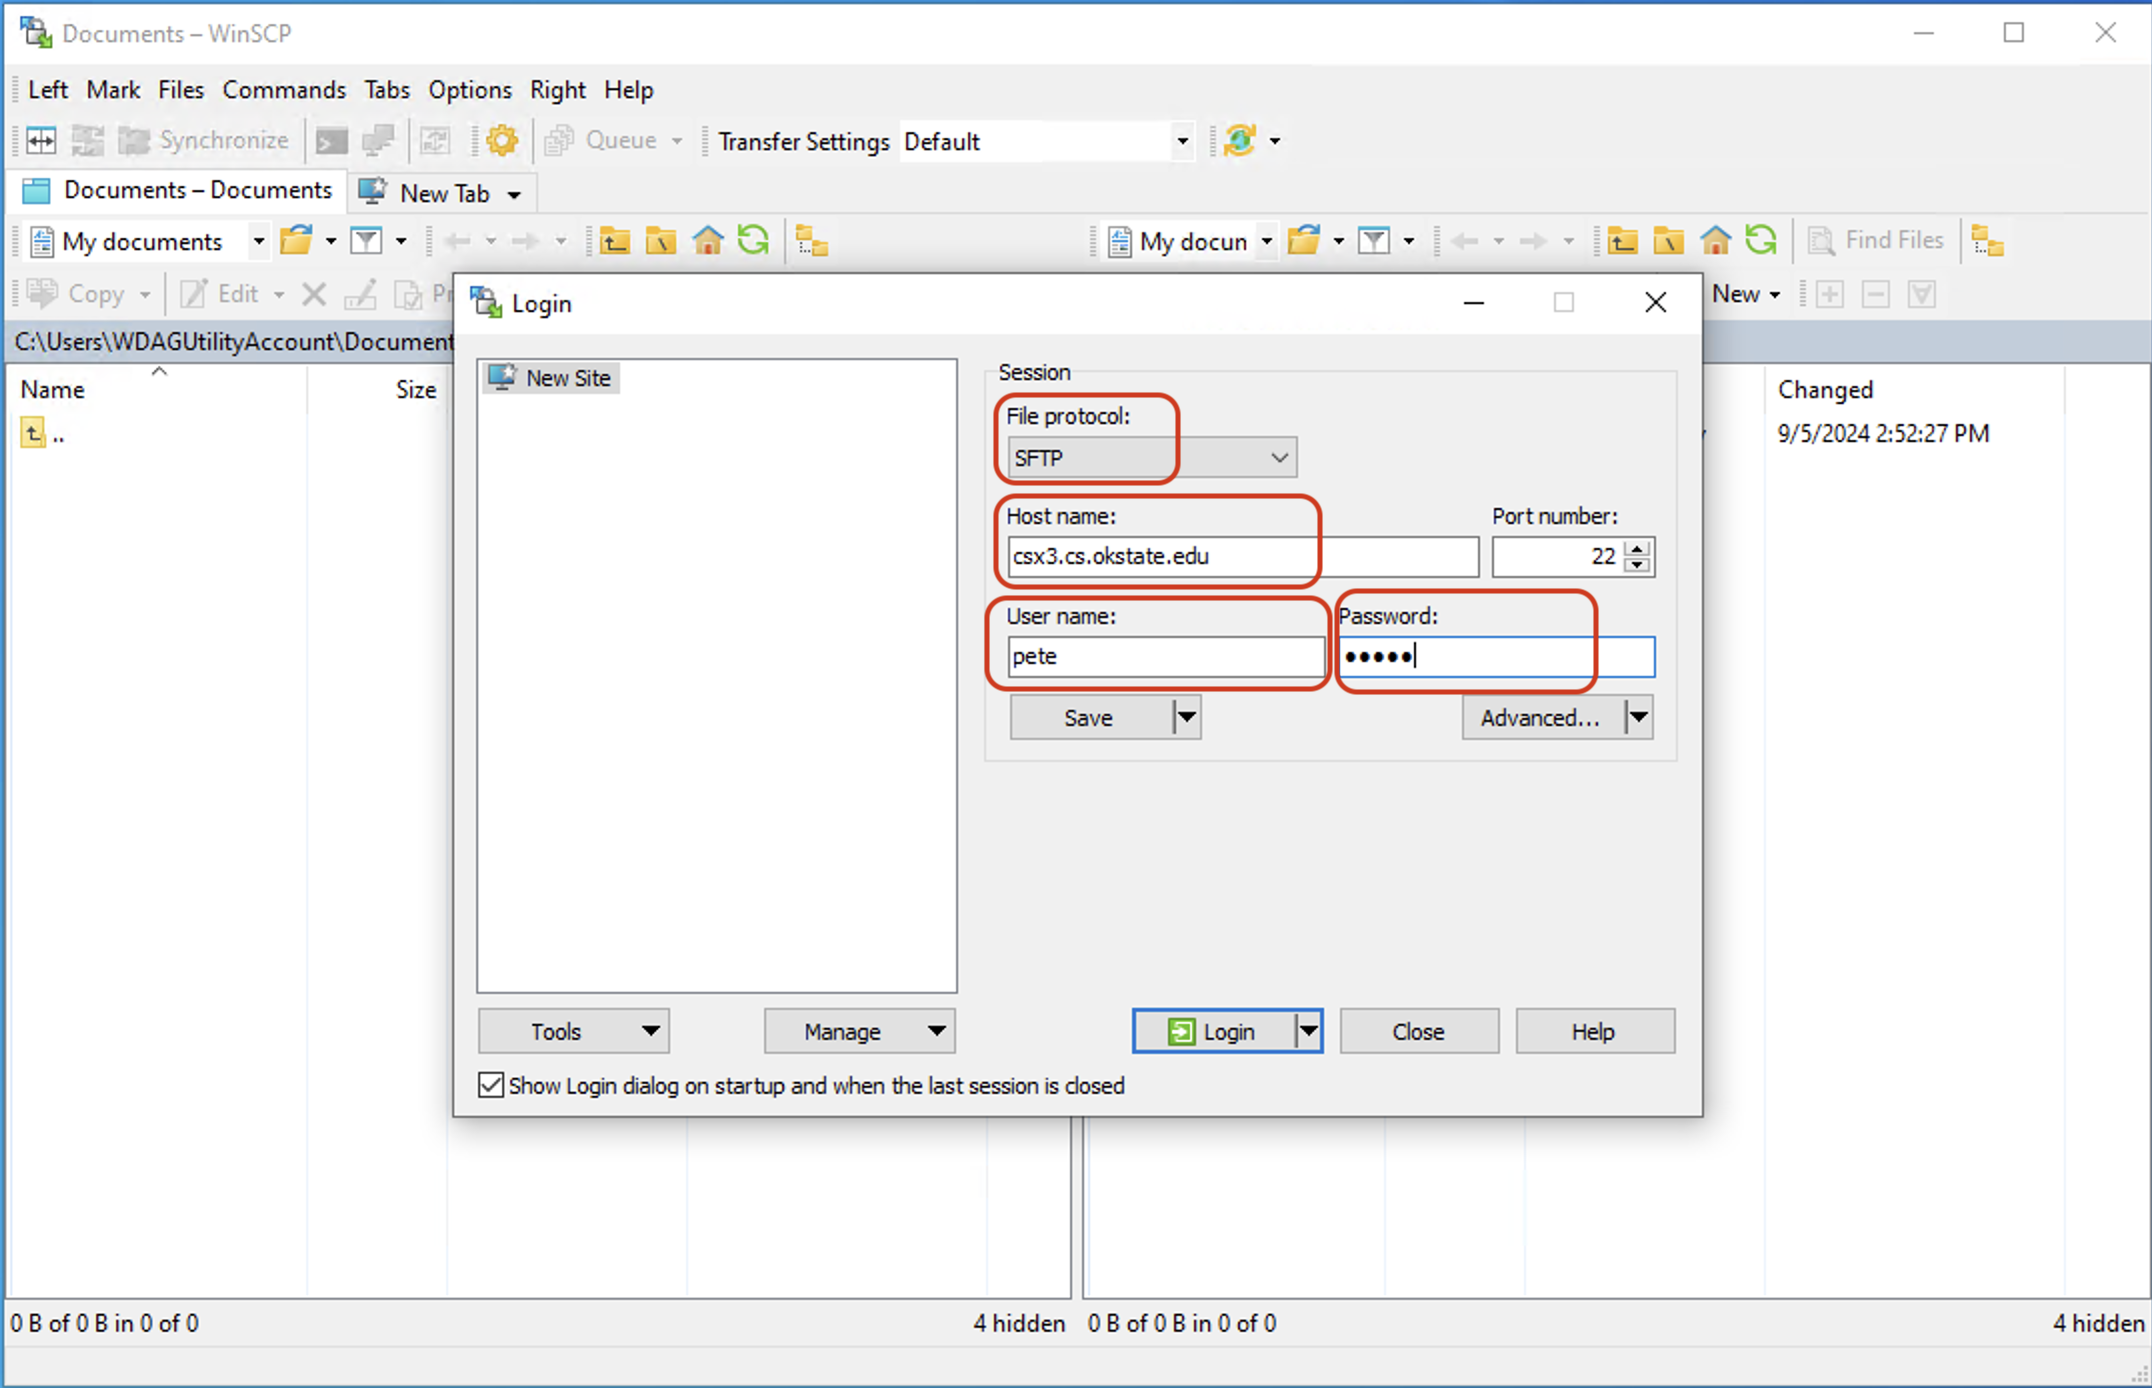
Using SFTP or SCP on WinSCP application:
- Open WinSCP application.
- Select [File protocol], SCP or SFTP.
- Type the CSX hostname under [Host name:].
- Type your CSX username under [User name:].
- Type your CSX password under [Password:].
- Click Login then click Accept.
For example:
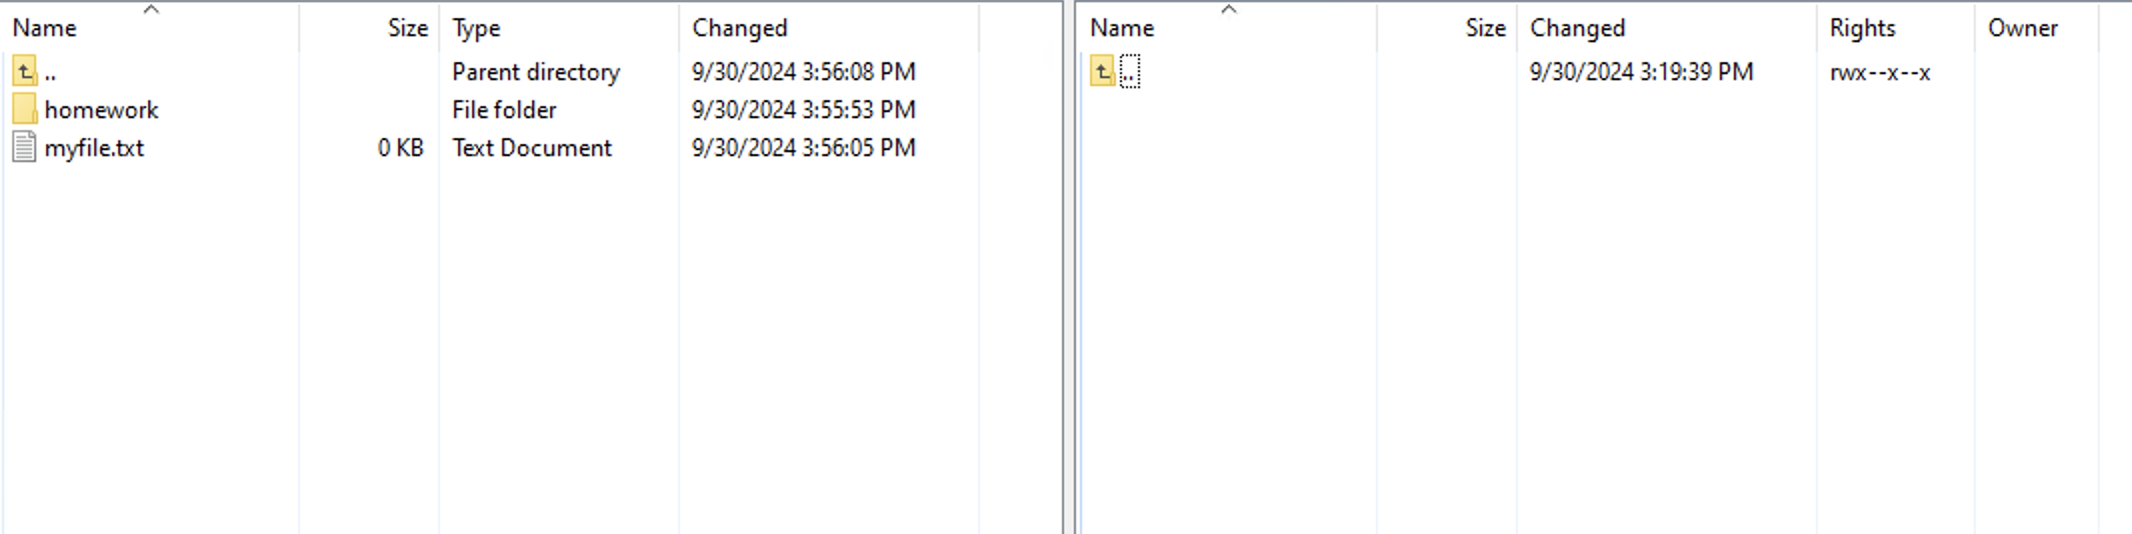
Creating a new site configuration. SFTP protocol has some advantages.Once you're connected using WinSCP, it's just drag and drop to transfer files.
- Local Side (Left Panel).
- Remote Side (Right Panel).
-
- Turning In Homework with handin
✓ Learn how to turn in homework with handin (if required)
While many CS classes use Canvas now, some still ask students to use
handin, a venerable command line tool that the department has made available for over 25 years. It may seem a little unobvious at first glance, but it's actually pretty straightforward from the student end. First, a few things you'll need to have before running handin:- The files you wish to hand in already uploaded to CSX (see previous section "Uploading Files: An Example" for help)
- The name of the class account (for example, cs1113)
- The name of the assignment directory (for example, pgm1)
Here are a few examples of running handin using the above example names (note that these commands must be run on a CSX node):
handin- Gives a very brief usage line
- --
handin cs1113- Lists all of the available assignment directories for a class account
- --
handin cs1113 pgm1- Lists all files you have already submitted in this directory
- --
In the example below, we are submitting an assignment file [myfile.txt] to course [cs1113] in the [pgm1] directory:
handin cs1113 pgm1 myfile.txt- Submits the file and emails you a confirmation
You can list multiple filenames when submitting rather than have to run handin once for each file. As with many Linux commands, you can run
man handinto see a description of the program.